Configure the Data Sources
This step is not required if using Nectari Cloud.
Environments and Data Sources
Tip
The description given to a data source created for the first time is used throughout the environments to describe this specific data source.
Give a generic description for the first time (e.g., ERP Data Source, Cube Data Source) and if necessary, rename it after the first environment has been created.
The following information is needed to configure the data sources:
- Database server credentials: Server name, Instance, Authentication strategy.
- Main ERP database information: Database and schema name.
- Users: Make sure to have created SQL or Oracle users beforehand.
ERP Data Source
-
In the upper-right corner, click on the
 to access the Administration section.

-
On the left pane, select Env. & Data Sources.
-
By default, there is an environment called Production, which you can rename by double-clicking in the name box. Press Enter once done.

-
In the Data Sources section, click
 Add to create a new data source.

-
Complete the ERP Data Source configuration for MS SQL Server and Oracle.
-
Click Validate and then Save to complete the data source configuration.
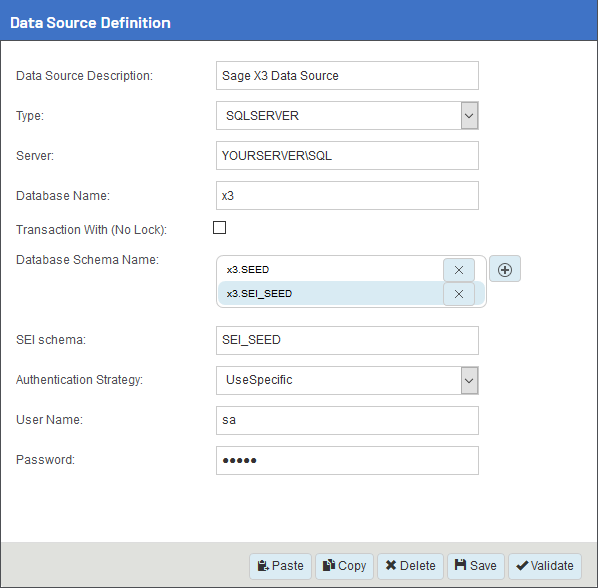
SQL Server Database
| Properties | Description |
|---|---|
| Data Source Description | Sage X3 Data Source |
| Type | SQLSERVER |
| Server | Database server of the data warehouse where Sage X3 has been synchronized in the DataSync configuration |
| Database Name | Name of the data warehouse where Sage X3 has been synchronized in the DataSync configuration (beware of the case sensitivity) |
| Database Schema Name | Create the two following entries by clicking on the + icon (replace DatabaseName by the appropriate value):
Note The second line contains the SEI Custom Schema. We highly recommend following this naming convention:
Note The application searches for tables in the same order as the schemas are listed. As soon as a table is found in a schema, the application stops searching. Therefore, if you have multiple tables with the same name in different schemas, make sure that the schema containing the table you want to use appears first. Important Choose a unique Custom Schema name for each environment. |
| SEI schema | Enter SEI_CUSTOM_SCHEMA (replace CUSTOM_SCHEMA with the schema name) |
| Authentication Strategy | UseSpecific |
| User Name | Name of the SQL user accessing the data warehouse. For example, sa |
| Password | The user's password |
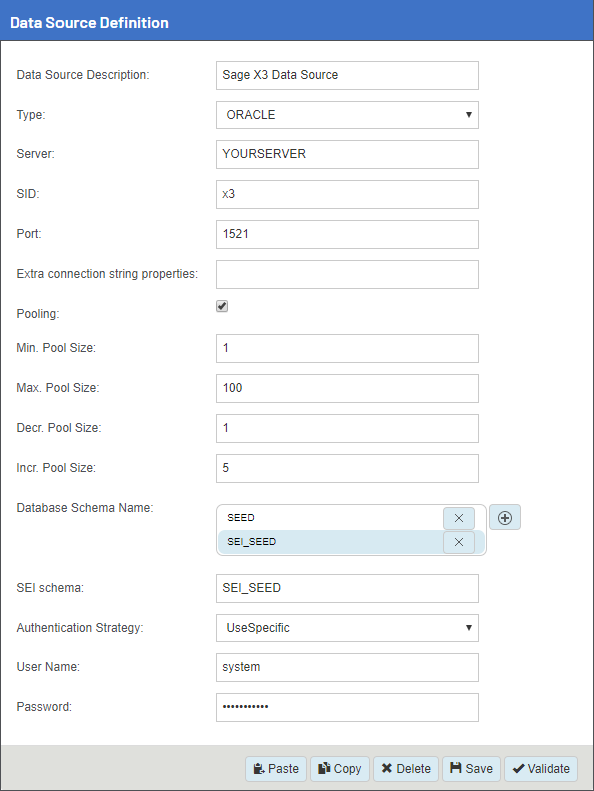
Oracle Database
| Properties | Description |
|---|---|
| Data Source Description | Sage X3 Data Source |
| Type | ORACLE |
| Server | Name of the Oracle server |
| SID | Name of Sage X3 database instance |
| Port | Port number of Sage X3 database instance |
| Database Schema Name | Create 2 entries by clicking on the + icon:
Note The second line contains the SEI Custom Schema. We highly recommend following this naming convention:
Important Choose a unique Custom Schema name for each environment. |
| SEI schema | Enter SEI_CUSTOM_SCHEMA (replace CUSTOM_SCHEMA with the schema name) |
| Authentication Strategy | UseSpecific |
| User Name | Name of user. |
| Password | The user's password |
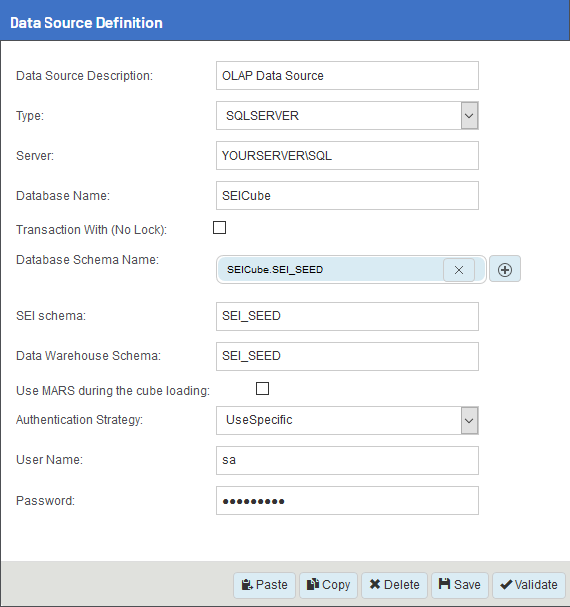
Cube Database
How to set Database as Datawarehouse
- Click Validate and then Save
- Click Set as Data Warehouse to define the data source as a data warehouse
Enter the following information:
Database warehouse schema: Enter the chosen SEICube. SEI custom schema again.
- Use MARS during the cube loading: Unchecked.
- Click Validate and then Save
SQL Server Database
In the same environment as the ERP data source, create a new data source for the OLAP Cube.
Complete the Data Source Definition with all the appropriate information.
| Properties | Description |
|---|---|
| Server | Database server where the NectariOLAP For SQL Server package is installed. |
| Database Name | SEICube |
| Database Schema Name |
|
| SEI schema | Enter the chosen custom schema for the current environment. |
Tip
Refer to Environments and Data Sources in the Administrator section for more details about the MARS option.
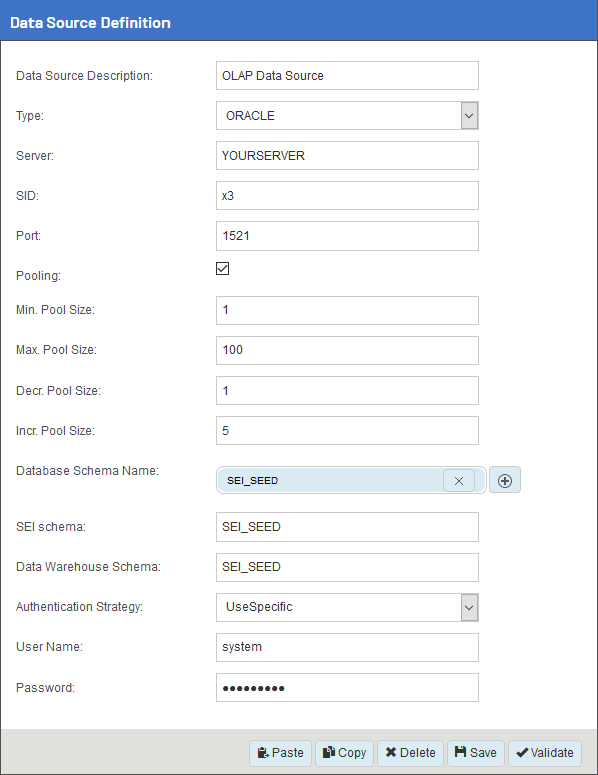
Oracle Database
| Properties | Description |
|---|---|
| Server | Name of the database server where the Central Point is installed |
| SID | SID of the Oracle database instance |
| Port | Port of the Oracle database instance |
| Pooling | Activating this option will improve performance (Refer to Environments and Data Sources for more details) |
| Database Schema Name |
|
| SEI schema | Enter the chosen SEI custom schema for the current environment. |
| Database Warehouse Schema | After saving the data source and set it as a data warehouse, enter the chosen Nectari custom schema for the current environment |